
Intro
Welcome back! I’m glad you decided to stick around. 😄
In the previous article, we took a look at how MVVM works and prototyped a very simple Counter app in UIKit using this wonderful architecture. In this one, I’d like to share with you a side project that I worked on recently where I attempted to integrate MVVM into a SwiftUI project.
Let’s get into it! (yuh 😸)
Collexion in SwiftUI
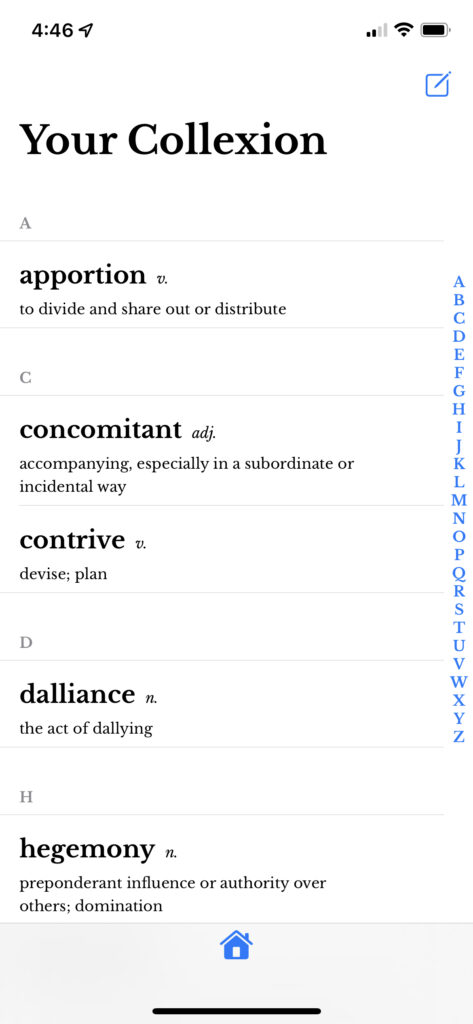
I have an obscene amount of free Passion Planners that a previous Bruin Entrepreneurs member dumped on me (thanks, Aneri). Instead of using them to get my life together, I use one to keep track of unfamiliar words that I come across while reading. I include definitions, and periodically go through them to try and strengthen my vocabulary. Unfortunately, while away for the holidays, I forgot my trusty notebook – so I thought, hey, why not build my own digital version?
So far, all I’ve implemented is the main screen (your Collexion of words – get it?) and the ability to add a new word. Here’s a link to the source code: https://github.com/ktan17/CollexionApp
Rather than run through the code in every file, I’d like to focus the rest of the article on my architecture decisions and implementation details.
The Service Layer
I created a CollexionService exposing the CRUD API for a user’s words. Its interface is pretty simple:
protocol CollexionServiceProtocol {
  var words: AsyncStream<[Word]> { get async }
  func add(word: Word) async throws
}
And here’s the implementation:
actor CollexionService: CollexionServiceProtocol {

  var words: AsyncStream<[Word]> {
    get async { wordsSubject.stream }
  }
  private let wordsSubject = AsyncCurrentValueSubject<[Word]>(value: [])

  init() {
    Task { [wordsSubject] in
      // Load words from User Defaults
      if let object = UserDefaults.standard.object(forKey: Constant.defaultsKey),
         let data = object as? Data,
         let words = try? PropertyListDecoder().decode([Word].self, from: data) {
        await wordsSubject.send(words)
      }
    }
  }

  func add(word: Word) async throws {
    let newValue = await wordsSubject.currentValue + [word]
    let object = try PropertyListEncoder().encode(newValue)
    UserDefaults.standard.set(object, forKey: Constant.defaultsKey)
    await wordsSubject.send(newValue)
  }

}
The AsyncCurrentValueSubject is a simple utility I made to mimic a BehaviorRelay/CurrentValueSubject. Here’s its source code too:
extension AsyncStream {
  static func pipe() -> ((Element) -> Void, Self) {
    var input: (Element) -> Void = { _ in }
    let output = Self { continuation in
      input = { element in
        continuation.yield(element)
      }
    }
    return (input, output)
  }
}

actor AsyncCurrentValueSubject<Element> {
  let stream: AsyncStream<Element>
  private(set) var currentValue: Element
  private let input: (Element) -> Void

  init(value: Element) {
    (input, stream) = AsyncStream<Element>.pipe()
    currentValue = value
    input(value)
  }

  func send(_ element: Element) {
    currentValue = element
    input(element)
  }
}
I plan to save a user’s words in an external database eventually, but for now UserDefaults will suffice. In the Swift 5.5 era, I think that it makes sense for all Services to be actors. This allows them to guarantee thread-safety and eliminate data races when two or more objects access them at the same time.
This means, however, that Service APIs all become async. This is okay because SwiftUI has great support for the async-await and structured concurrency APIs.
The CollexionService exposes an AsyncStream of [Word], and an async add(word:) method. This way, all a View needs to do is subscribe to the words stream—when some other View adds a new word, the stream will fire with the updated value and the UI will automatically update. No data needs to be passed between Views; there is one source of truth.
EDIT (3/29/2022): Unfortunately, I have recently learned that
AsyncStreamactually does not support sharing. If two or more clients attempt to iterate through it at the same time, the program will crash. I’ll probably need to use a Combine subject to get the functionality that I need.
Another benefit of async-await that really excites me is compiler-enforced error handling. In RxSwift, Observables can throw errors, but code to catch them is optional. Now that Service protocol methods can be marked as throwing, the compiler will force ViewModels that use those methods to handle the error.
Additionally, you’ll notice that the CollexionService lives on a singleton Dependencies instance. This is the way we keep track of our services at Raya!
ViewModels
I found that the concept of ViewModels as stateless functions doesn’t seem to fit well within SwiftUI. Having a separate Outputs struct containing Binding and Publisher types seems to sacrifice the simplicity associated with the @Published property wrapper, and I also couldn’t find a great place in the View to call the ViewModel and bind to its outputs.
As a result, I decided to conceptually model ViewModels as bags of state. Instead of using callAsFunction, ViewModels now simply generate their outputs on initialization and expose them as @Published properties and get-only callbacks. You can even mark certain @Published properties as private(set) to prevent using them as bindings, thereby mimicking the behavior of Observables. For the best example, check out the EditWordView/ViewModel:
class EditWordViewModel: ObservableObject {
  ...

  // MARK: - Outputs

  @Published var title: String
  @Published var definition: String
  @Published var partOfSpeech: PartOfSpeech?
  @Published var isPresentingAlert = false
  @Published private(set) var isAddButtonDisabled = true
  @Published private(set) var isFocused = false
  @Published private(set) var isUploading = false
  @Published private(set) var uploadError: Error?
  private(set) var onAppear: () -> Void = {}
  private(set) var cancelAction: () -> Void = {}
  private(set) var addAction: () -> Void = {}
  private(set) var dismissAlertAction: () -> Void = {}
  let titleValidator: (String) -> String?
  let definitionValidator: (String) -> String?

  // MARK: - Initializers

  init(deps: Deps) {
    // Creating outputs... here's one example

    $title
      .combineLatest($definition, $partOfSpeech)
      .receive(on: DispatchQueue.main)
      .sink { [weak self] title, definition, partOfSpeech in
        self?.isAddButtonDisabled = (
          title.isEmpty || definition.isEmpty || partOfSpeech == nil
        )
      }
      .store(in: &cancellables)
  }

  ...
}
There are a few other notes I’ll make:
- I think that the View should solely be a function of its ViewModel’s state for a clean separation of concerns. This means that if a View has a ViewModel, it should not have any
@Stateproperties. I couldn’t exactly figure out how to move the@FocusStateproperty wrapper into the ViewModel since it’s new, but I hope that in the future it becomes possible.
- Typically, you need to create multiple state drivers as functions of a single one. This is easy to implement in RxSwift – a
Driverof some Model type can be transformed (using a series of functions) to multiple other driver types (likeDriver<String>,Driver<CGFloat>, etc.). They can then be used by different views that should all update together.
However, given a single CombinePublisher, I couldn’t find any way to transform it into other publishers that I could assign to@Publishedproperties. I’m not even sure if it’s possible to assign to a@Publishedproperty’s projected value in the first place. There is anassign()function, but this is basically syntactic sugar for asink(and it strongly retains the object you give it!).
The way I got around this was by creating a state machine (using a helperenum) and subscribing to it. This way, it’s easy to see which state changes correspond to each case in theenum. You can see this on line 130 of the EditWordViewModel:
uploadStateSubject
  .merge(with: Just(.idle))  // startWith
  .receive(on: DispatchQueue.main)
  .sink { [weak self] uploadState in
    guard let self = self else { return }

    switch uploadState {
    case .idle:
      self.isUploading = false
      self.uploadError = nil
    case .uploading:
      self.isUploading = true
    case let .failed(error):
      self.isUploading = false
      self.uploadError = error
      self.isPresentingAlert = true
    }
  }
  .store(in: &cancellables)
Routing
Navigation was by far the most difficult problem to tackle. In UIKit, navigation is imperative; you make an explicit call to present or dismiss to get things done. But in SwiftUI, navigation is state-driven and declarative. To push a View onto a navigation stack, you wrap the destination view in a NavigationLink. To present a modal View or an alert, you use View modifiers that take in a boolean Binding which determines if the View/alert should be presented or not.
The problem arises when you want to present another View that must be initialized with a ViewModel. Suddenly, Views become responsible for constructing ViewModels, which requires them to have direct access to the Service layer. Everything becomes tightly coupled again, which is Gross. We need to delegate ViewModel construction to another object.
Attempted Solutions
Unfortunately, since there are no navigation functions on Views, a Coordinator does not work well. It has no function that it can imperatively call to present another View. I did check out this very nifty framework called Stinsen that provides support for the Coordinator pattern, but it felt like a heavy-handed solution.
Then, I thought about the way navigation is typically performed in React. Aside from <a> elements, one ubiquitous out-of-the-box solution is react-router. Essentially, a router works by observing your URL history—when it changes, it swaps in a React Component that is declaratively associated with a given path. I found a package called SwiftUIRouter that mimics this pattern. Here’s a snippet from the README:
SwitchRoutes {
  Route("latest") {
    LatestNewsScreen()
  }
  Route("article/:id") { info in
    NewsArticleScreen(articleID: info.parameters["id"]!)
  }
  Route(":unknown") {
    ErrorScreen()
  }
  Route {
    NewsScreen()
  }
}
However, you can see what’s happening here isn’t quite navigation—as mentioned earlier, the top-level Router simply renders different views based on the current Route. In order to animate navigation, the package uses transition modifiers, which also felt like a workaround for SwiftUI’s design.
Lastly, I discovered PointFree’s swiftui-navigation package after already settling on a solution of my own. At a first glance, it looks like what I implemented, but it’s much neater and fancier. I’ll have to do some more experimentation!
My Solution – Clean Swift/VIPER Routers
I’ve previously developed using the Clean Swift architecture, which I believe is based on VIPER. It defines its own notion of a Router object: all Views own a Router object that they use to perform navigation. Similar to Coordinators, Routers are also responsible for constructing the next View and passing any needed data.
I decided to tweak the idea of Routers a bit so that, now, every SwiftUI View owns its own ViewModel and Router. However, if you check out Router.swift, you’ll see that a Router’s sole responsibility is to implement a destination function that constructs the appropriate View for some given Route:
protocol Router {
  associatedtype Route
  associatedtype DestinationView: View

  @ViewBuilder
  func destination(for route: Route) -> DestinationView
}

extension Router {
  var dependencies: Dependencies {
    Dependencies.shared
  }
}
All Routers also hold a reference to the View’s ViewModel and have access to the Dependencies singleton. This allows them to pass data and inject services as needed.
It’s a rough starting point, but it was sufficient to completely separate navigation and the construction of ViewModels from the View layer. I was also able to maintain the ability to discretize the points of navigation from a View using Route enums. Honestly, given their functionality, Routers might more aptly be named Builders, but I don’t know enough about RIB to make that choice!
There are a few cons to my approach. The most glaring is the dismissal of modally presented Views. If you check out the HomeRouter, you’ll see that I need to pass the boolean Binding that controls presentation from the HomeViewModel to the EditWordViewModel:
// MARK: - Router
@ViewBuilder
func destination(for route: Route) -> some View {
  switch route {
  case .addWord:
    let viewModel = ObservedObject(
      wrappedValue: EditWordViewModel(
        deps: .init(
          isPresented: $viewModel.shouldShowEditor,
          collexionService: dependencies.collexionService
        )
      )
    )
    EditWordView(viewModel: viewModel)
  }
}
To trigger dismissal of the sheet, the EditWordViewModel sets this Binding to false, which effectively means that it contains navigation logic that it shouldn’t. Perhaps I could come up with a way to propagate events up the Router chain so that the write to the Binding occurs within a Router, but this adds quite a bit of complexity.
Miscellaneous
I left some space here to elaborate on some other patterns you’ll see around the codebase. :O
Constants
// MARK: - Constant

private enum Constant {
  static let title = "Your Collexion"
  static let addWordImageName = "square.and.pencil"
}
Whenever we need to use certain constant values, we create a private Constant namespace. This provides a dedicated place to look for constants and keeps our code clean. It also makes us more resilient to design changes.
Deps
// MARK: - Deps

struct Deps {
  let title: String = ""
  let definition: String = ""
  let partOfSpeech: PartOfSpeech? = nil
  let isPresented: Binding<Bool>
  let collexionService: CollexionServiceProtocol
}

private let deps: Deps

init(deps: Deps) {
  self.deps = reps
}
Instead of passing services and other parameters directly to ViewModel initializers, we bundle them together in a Deps struct. This is because, using the former method, you need to write 3 lines of code if you want to add another parameter (initializer parameter, property declaration, self.blah = blah). Using the Deps struct, we only need 1 line of code.
Theme Injection
struct Theme {
  // ... Other UI-related constants
  var smallPadding: CGFloat = 8
  var mediumPadding: CGFloat = 16
  var largePadding: CGFloat = 24
}

extension View {
  var theme: Theme {
    .init()
  }
}
This is actually something I picked up from another internship I had. A Theme object encapsulates visual design constants such as padding values and fonts. You inject Themes into every View, which can override default values if needed. Ideally, you can parse a JSON file containing all of these values when the app starts to create the Themes that you need. This way, if you have shared UI code amongst multiple apps, you can easily create new Themes and manage your constants in one place. Furthermore, it prevents you from duplicating common constants across your app, and incentivizes the design team to use standard spacings and font sizes.
And that’s about it! I look forward to reading any feedback or suggestions for the architecture I ended up with. 😄
Conclusion
Though I have limited experience in the professional field, I have increasingly found that good architectural decisions are far more dependent on their context (i.e. the existing codebase and the team working on it) rather than their theoretical merits.
While it is of course important to strive for principles like scalability and testability, rebuilding entire systems from the ground up with the aim of implementing “better” architectures isn’t always the right thing to do–and it’s seldom feasible. My goal here wasn’t to present you with the one supreme architecture; rather, I hope you found bits and pieces which could work well in whatever iOS projects you’re working on. And I also hope I got to teach you at least one new thing! 😄
If by chance you want the opportunity to work with me at a company which prioritizes giving engineers the freedom to explore new technologies and frameworks, check out the Raya careers page here. Or feel free to shoot me an email at [email protected] 🙂
Until next time! I hope my vocabulary will be much fancier by then. ☺️